


MK2 sill repair
-
 TrevMk2
Topic author
Re: MK2 sill repair
Hello again, I found my camera, it wasn't in the garage after all, found it on the floor under me desk, think it might be goosed know because I found it by standing on it!.
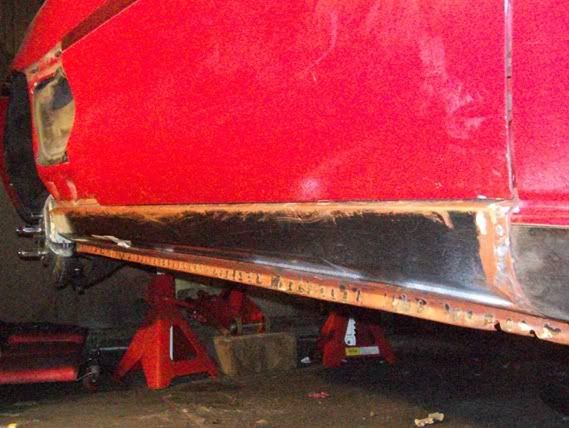
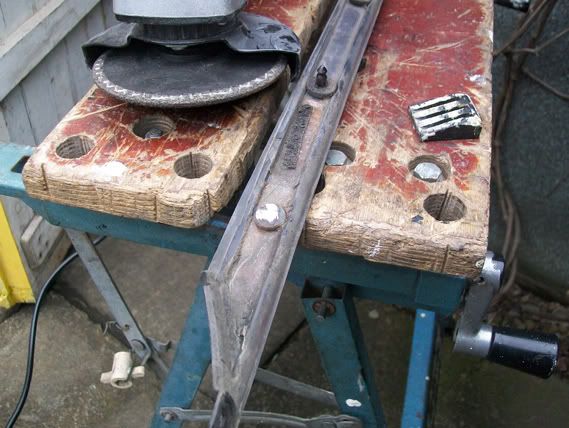
Just a shot of the extra holes drilled.
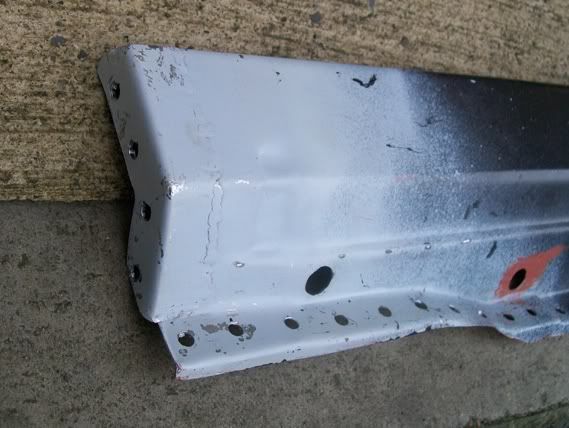
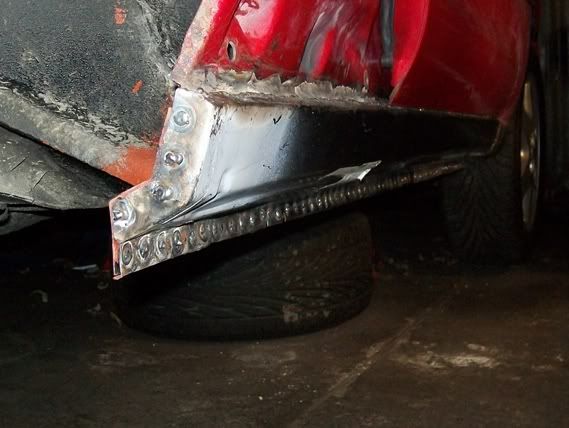
Welded in, I started by spot welding it in along the top then seam welded it, then plug welded along the bottom.
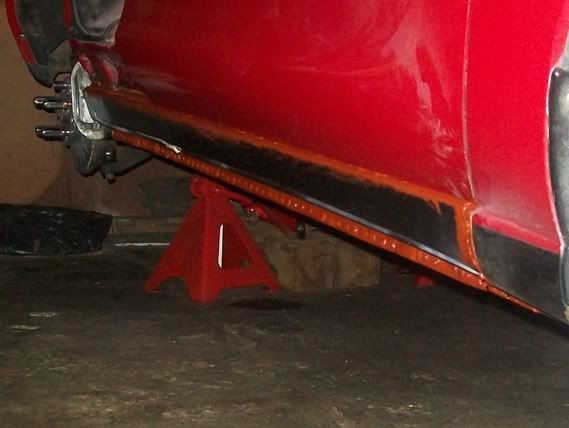
The red paint is just to keep the rust out and all welds need grinding down and filler needs to be used to tidy this up, so she looks a bit rough at the moment, hopefully I'll be grinding next Saturday.
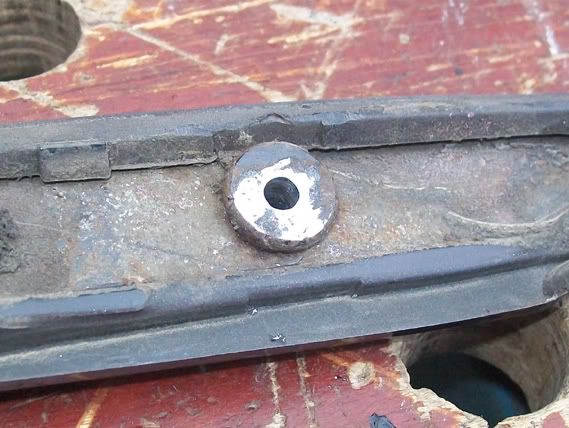
This shows the extra plug weld holes that I put in, and the extra drainage hole.
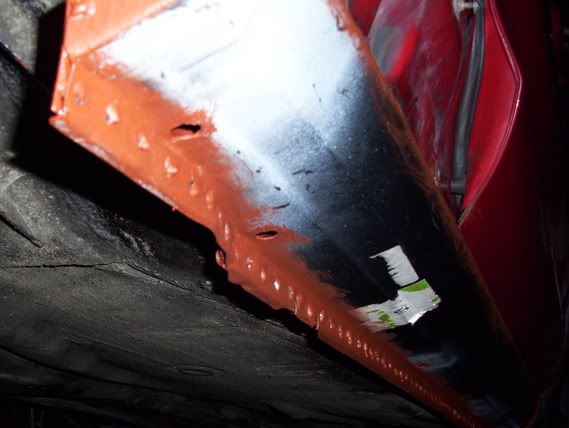
I've tried to keep the top lip as the original line to follow the wing, hope the pic shows this okay.

The weld along the top and down the front of the sill are continuous seam welds, and again it needs grinding down flush with the sill and not too far that it looses it's hold or strength.

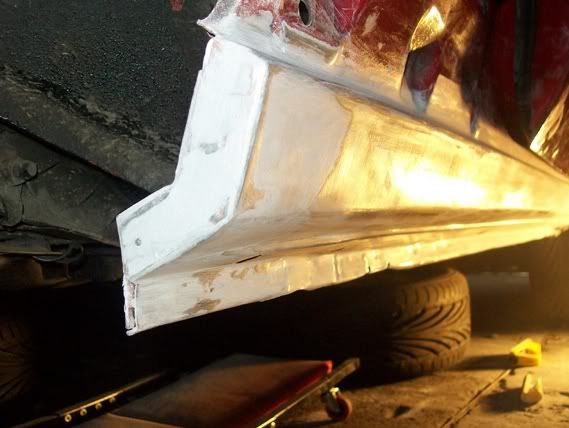
Plug welded the sill end.

Once the front end weld is ground down, I'll be using Metalised filler to smooth any differences between original sill and new.

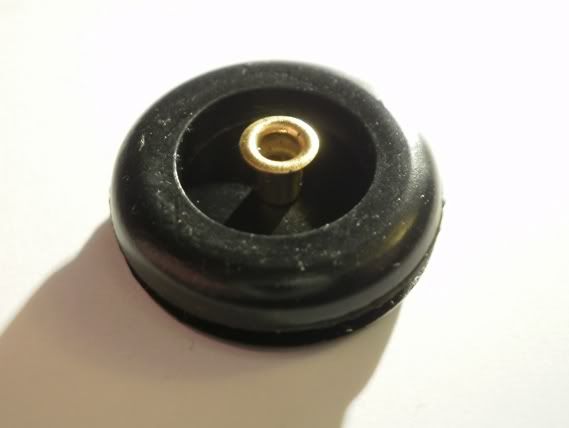
I've also been looking at the drainage grommets and thought I'd have a go at making something that would let the water escape.
This is a 13mm grommet, and a small brass servo mount tube (the model aircraft servo's have these for the screws that hold the servo in place) that goes though the grommet.

I used the brass tube to punch a hole in the grommet, and pushed it though, I'll use Araldite to secure it in place.
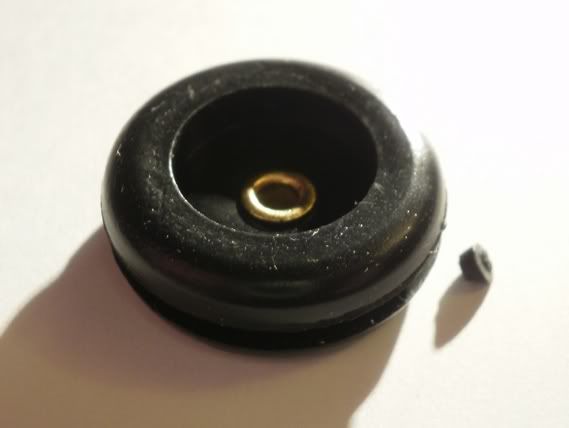
Cut two sections out for the part that goes into the sill so the water has somewhere to escape, I don't know if this will work but it must be better than just putting the grommet in!

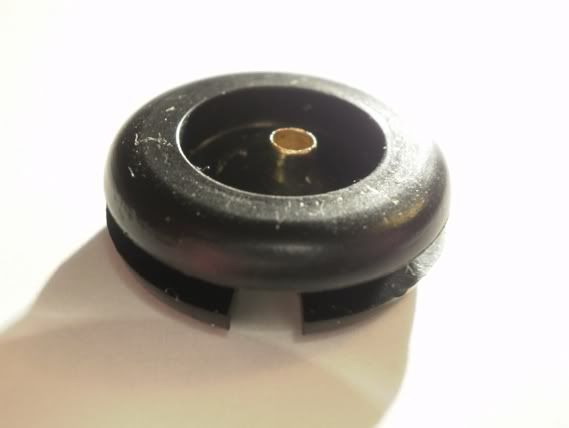
The part that sticks out of the sill.
or do you think it's better to get the Toyota ones?
Just a shot of the extra holes drilled.
Welded in, I started by spot welding it in along the top then seam welded it, then plug welded along the bottom.
The red paint is just to keep the rust out and all welds need grinding down and filler needs to be used to tidy this up, so she looks a bit rough at the moment, hopefully I'll be grinding next Saturday.
This shows the extra plug weld holes that I put in, and the extra drainage hole.
I've tried to keep the top lip as the original line to follow the wing, hope the pic shows this okay.
The weld along the top and down the front of the sill are continuous seam welds, and again it needs grinding down flush with the sill and not too far that it looses it's hold or strength.
Plug welded the sill end.
Once the front end weld is ground down, I'll be using Metalised filler to smooth any differences between original sill and new.
I've also been looking at the drainage grommets and thought I'd have a go at making something that would let the water escape.
This is a 13mm grommet, and a small brass servo mount tube (the model aircraft servo's have these for the screws that hold the servo in place) that goes though the grommet.
I used the brass tube to punch a hole in the grommet, and pushed it though, I'll use Araldite to secure it in place.
Cut two sections out for the part that goes into the sill so the water has somewhere to escape, I don't know if this will work but it must be better than just putting the grommet in!
The part that sticks out of the sill.
or do you think it's better to get the Toyota ones?
Last edited by TrevMk2 on 28/02/10 8:12, edited 2 times in total.
-
TrevMk2
Topic author
Re: MK2 sill repair
Hello, just a quick update on my progress.
Started to grind the welds down, this took sometime using the grinder and file.
Used Metalised fillers and sanded to bend into the shape.


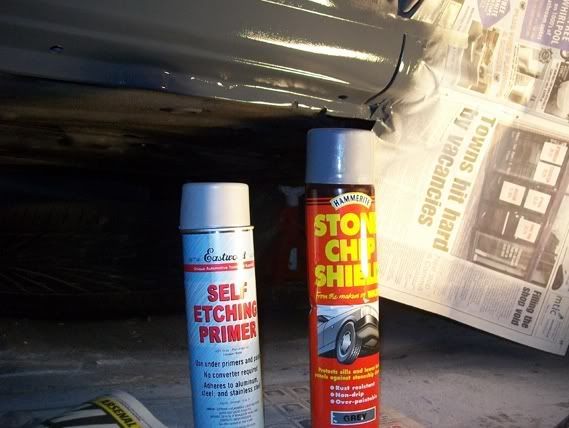
Used etch primer first I used about 3 layers.

Then I used some Stone Chip guard following the same line as the Stone Chip guard on the wing.

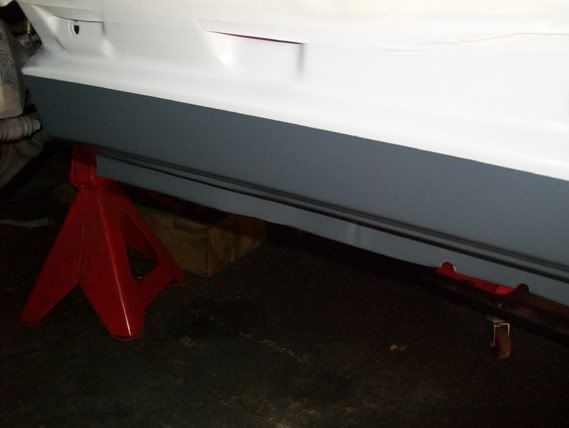
Then I've used 3 layers of red primmer over the top.
So hopefully next weekend top coat layers and the the top black Stone Chip Guard layer to match the original look.
Started to grind the welds down, this took sometime using the grinder and file.
Used Metalised fillers and sanded to bend into the shape.
Used etch primer first I used about 3 layers.
Then I used some Stone Chip guard following the same line as the Stone Chip guard on the wing.
Then I've used 3 layers of red primmer over the top.
So hopefully next weekend top coat layers and the the top black Stone Chip Guard layer to match the original look.
-
TrevMk2
Topic author
Re: MK2 sill repair
Hello, just an update.
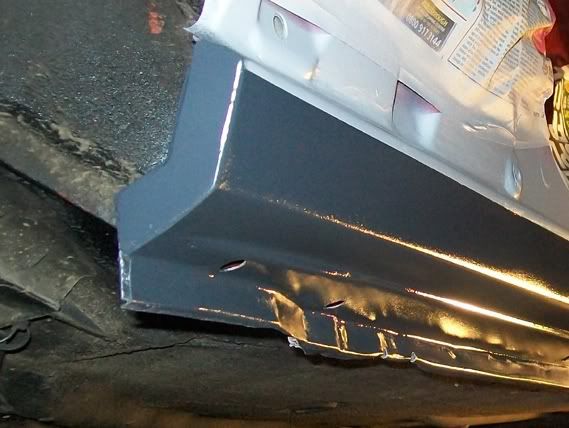
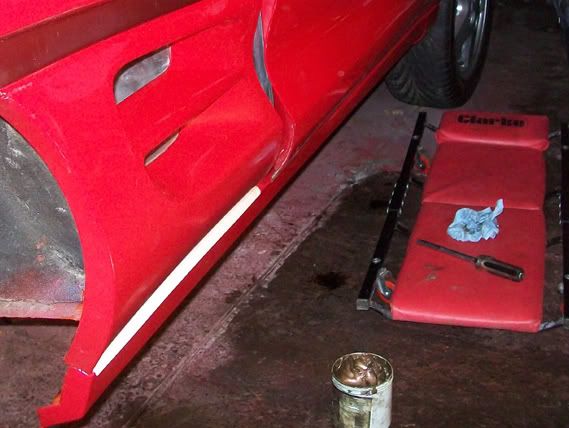
I've had another look at how I'll be painting the sill and thought it might look okay in red instead of black like the original, what do you think? I've removed the securing bolt (it snapped) and other plastic parts around that area, sanded it down to remove the black stuff and primer then stone guarded it then another coat of primer over that. I've also black stone guarded the bottom flange this will be masked off when the red top coat is applied.


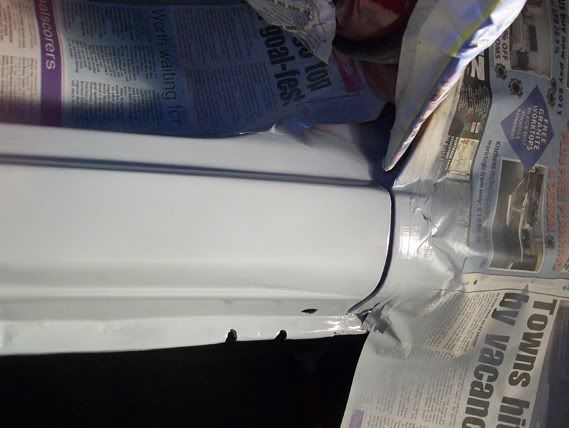
Masked the flange off.

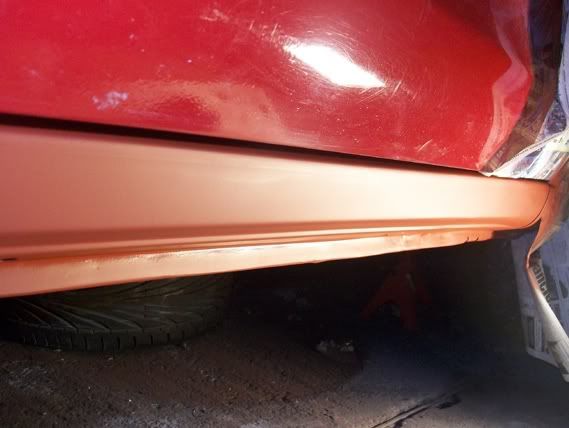
Then started to apply some top coat, I haven't got experienced in spraying but I'll give it a go! using spay cans is not Ideal I know, but I haven't got that sort of equipment! but I'll see what it look's like.
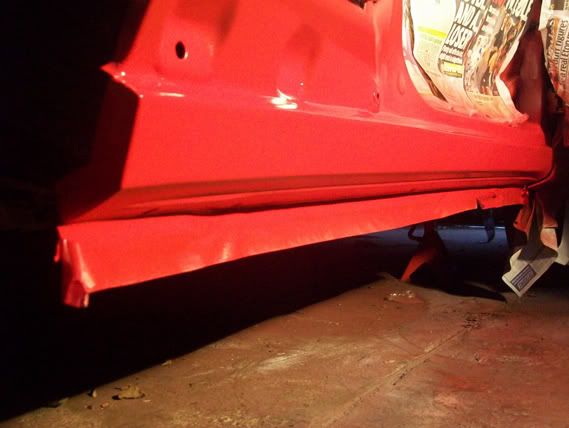
That's not too bad, apart for the colour being a very slight bit brighter.
While that was drying off I thought I'd have a look at the black strip that runs along the top of the air intake panel, the nut snapped the stud, and one of the studs on the air intake was also snapped.
First I ground the old stud off.
Then drilled the right sized hole for the tap.
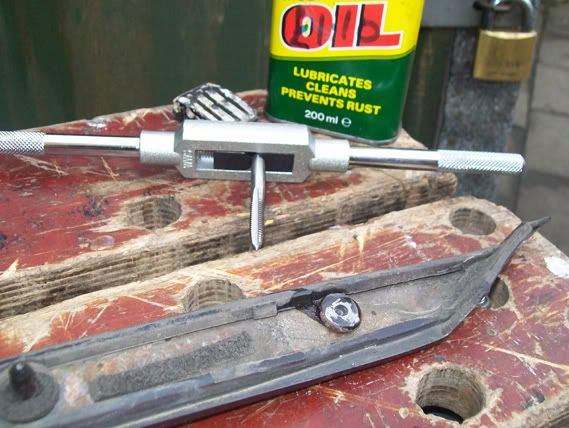
Fitted the bolt to see if all was okay, then cut the bolt head off.
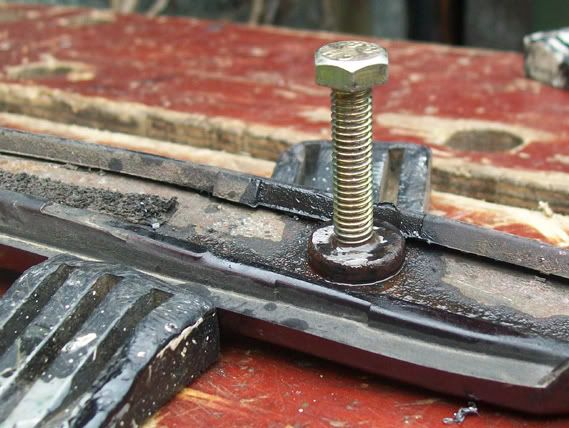

This will be well greased up so hopefully it won't be snapping off again!

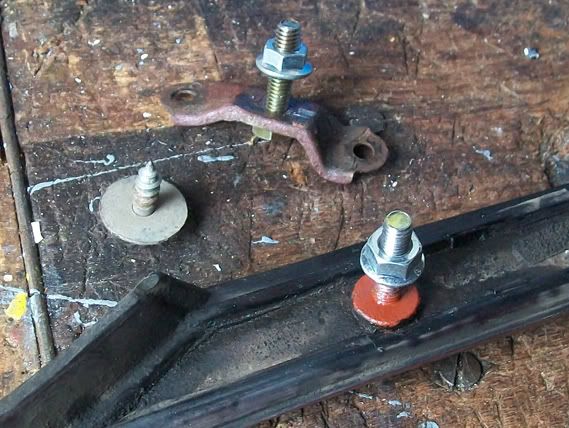
The one to the back is the repair for the air intake stud that snapped off.
Went into the garage after about 2 hours to have a look at how the paint was going, and gave it another top coat.
It's had 3 top coats and was left for about 3 hours, then I removed the masking from the bottom flange.
One thing that I have noticed are a couple of small paint runs, I've left these alone for now just to let the paint harden.
I've had another look at how I'll be painting the sill and thought it might look okay in red instead of black like the original, what do you think? I've removed the securing bolt (it snapped) and other plastic parts around that area, sanded it down to remove the black stuff and primer then stone guarded it then another coat of primer over that. I've also black stone guarded the bottom flange this will be masked off when the red top coat is applied.
Masked the flange off.
Then started to apply some top coat, I haven't got experienced in spraying but I'll give it a go! using spay cans is not Ideal I know, but I haven't got that sort of equipment! but I'll see what it look's like.
That's not too bad, apart for the colour being a very slight bit brighter.
While that was drying off I thought I'd have a look at the black strip that runs along the top of the air intake panel, the nut snapped the stud, and one of the studs on the air intake was also snapped.
First I ground the old stud off.
Then drilled the right sized hole for the tap.
Fitted the bolt to see if all was okay, then cut the bolt head off.
This will be well greased up so hopefully it won't be snapping off again!
The one to the back is the repair for the air intake stud that snapped off.
Went into the garage after about 2 hours to have a look at how the paint was going, and gave it another top coat.
It's had 3 top coats and was left for about 3 hours, then I removed the masking from the bottom flange.
One thing that I have noticed are a couple of small paint runs, I've left these alone for now just to let the paint harden.
Last edited by TrevMk2 on 28/02/10 8:20, edited 1 time in total.
-
 Ripley
- Posts: 1531
- Joined: 04/09/05 1:00
- Years of MR2 Ownership: 22
- MR2's Owned: 3
- Real Name: Ann
- Location: Perthshire
Re: MK2 sill repair
Nearly at the finishing line now. Its looking good. It'll be interesting to see a side on shot when the paintings finished. Well done for all the hard work, you've certainly stuck with it 

Save the bunnies!
-
TrevMk2
Topic author
Re: MK2 sill repair
Hi Ripley, I'm not at the finishing post just yet, I've got the other side to do! It's difficult to get a good shot of the side in the garage.
Been busy putting another top coat on but first I've rubbed those small runs out with very fine wet and dry.
And while that was drying I fabricated the rear lower area parts for the n/s, so I have everything ready for the passenger side that I think I'll need.
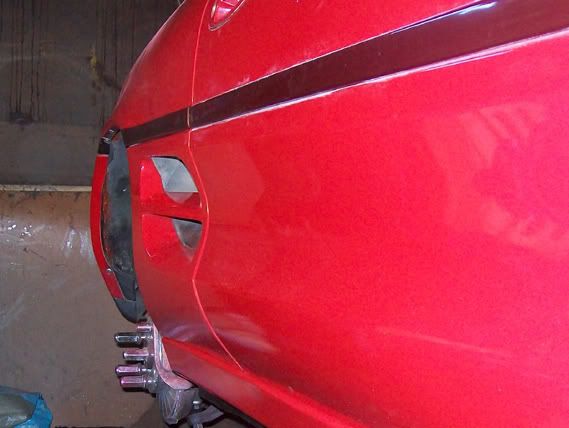
I've taken a shot with the air intake panel and black strip loosely in place, the front wing still needs to be bolted back up but I'm leaving it till next weekend to give the paint time to harden.
Been busy putting another top coat on but first I've rubbed those small runs out with very fine wet and dry.
And while that was drying I fabricated the rear lower area parts for the n/s, so I have everything ready for the passenger side that I think I'll need.
I've taken a shot with the air intake panel and black strip loosely in place, the front wing still needs to be bolted back up but I'm leaving it till next weekend to give the paint time to harden.
-
TrevMk2
Topic author
Re: MK2 sill repair
Hello, well she's getting there, I've been working on putting the cavity wax in the sills and putting all the trim back.
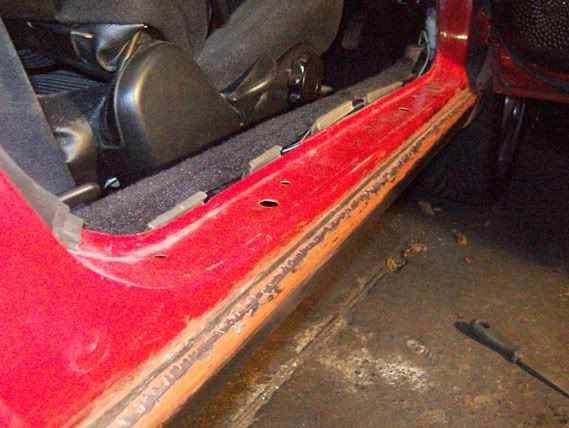
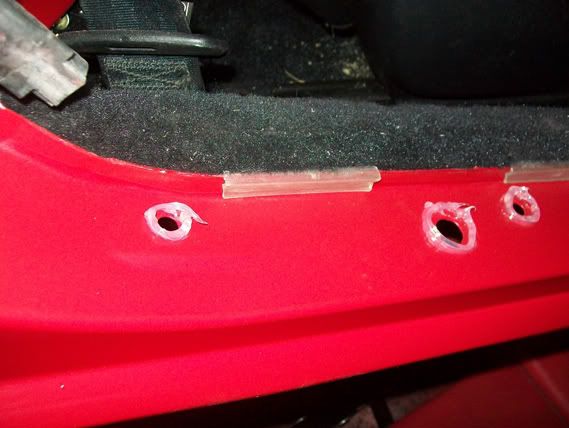
First I thought I would have a look at the holes for the trim on the top step of the sill.
To stop any water running down these I thought a small ring of silicon sealer might help.
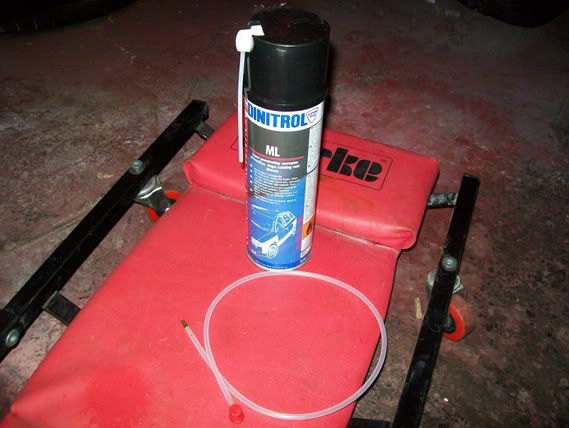
While the sealer was drying I started work on the cavity wax in the sill, I used Dinitrol ML, this was straight forward but very messy when it started dripping out of the drainage holes and seams.
While that was draining I bolted the front wing back up and put all the plastic parts back on.
Turned to the air intake area, but first put some low tack masking tape over the sill top.

Put the steel frame back that holds the rubber up.

Then the panel and top strip.
Removed the masking tape once everything was fitted.
Once the wax had stop dripping I had a go at fitting the grommets I made, this didn't work out as I was expecting it to, the copper tube part just came out so I abandoned the copper tubes and just fitted the grommets with the holes in.
After that I put the interior back together, seat belt mechanism, trim etc, so she's all back together again on this side.


Next week I'll have to turn her around to start working on the other sill, this should be quicker as I have all the panels fabricated and ready, when I take her out to turn around I'll take a few pic's from the side.
First I thought I would have a look at the holes for the trim on the top step of the sill.
To stop any water running down these I thought a small ring of silicon sealer might help.
While the sealer was drying I started work on the cavity wax in the sill, I used Dinitrol ML, this was straight forward but very messy when it started dripping out of the drainage holes and seams.
While that was draining I bolted the front wing back up and put all the plastic parts back on.
Turned to the air intake area, but first put some low tack masking tape over the sill top.
Put the steel frame back that holds the rubber up.
Then the panel and top strip.
Removed the masking tape once everything was fitted.
Once the wax had stop dripping I had a go at fitting the grommets I made, this didn't work out as I was expecting it to, the copper tube part just came out so I abandoned the copper tubes and just fitted the grommets with the holes in.
After that I put the interior back together, seat belt mechanism, trim etc, so she's all back together again on this side.
Next week I'll have to turn her around to start working on the other sill, this should be quicker as I have all the panels fabricated and ready, when I take her out to turn around I'll take a few pic's from the side.
-
 hermit
- Posts: 155
- Joined: 26/01/04 0:00
- Current Model: MK2
- Years of MR2 Ownership: 28
- MR2's Owned: 1
- Gender: Male
- Location: Nags Head, Gloucestershire
Re: MK2 sill repair
This is a very good post. Congrats for seeing this through.
Had similiar problem a year ago, though caught before rust reached the inner section (I hope, or rather so I've been told ). Have to say getting dribbles of rust (this despite wax oiling) the rear wheel arch welds (any peeps any ideas?)
  .
.
As a side, the chap who welded up sill recommend, since the sills had been liberally waxed on the inner sections, to leave the sill gromits out. As a matter of precaution I always avoid the puddles now.
So be warned, if you see a white rev1 lurching around the roads of Cirencester, don't be too perturbed. Its in the sake of preservation!
Hermit
Had similiar problem a year ago, though caught before rust reached the inner section (I hope, or rather so I've been told
As a side, the chap who welded up sill recommend, since the sills had been liberally waxed on the inner sections, to leave the sill gromits out. As a matter of precaution I always avoid the puddles now.
So be warned, if you see a white rev1 lurching around the roads of Cirencester, don't be too perturbed. Its in the sake of preservation!
Hermit
-
BrianDeacon
Topic author
Re: MK2 sill repair
Very nice job Trev. Its really looks good. Just the other side to do then!!!! I wish mine had progressed as well and quickly. Rain has stopped play for the last few weeks and now will be away until the end of March so had to Sorn the MR2. Hopefully the weather will be better in April. Brian
-
xvillax
Topic author
Re: MK2 sill repair
Looks like the astra sills Make a nice match much better than the ka and feista ones
well done mate...
will starting mine in the next week or so.. not looking forward to it tho
well done mate...
will starting mine in the next week or so.. not looking forward to it tho
-
Ripley
- Posts: 1531
- Joined: 04/09/05 1:00
- Years of MR2 Ownership: 22
- MR2's Owned: 3
- Real Name: Ann
- Location: Perthshire
Re: MK2 sill repair
Great job Trev really well done. Got an idea what it looks like now Hope the onther side goes smoothly for you 
Save the bunnies!
-
Mr Blue
Topic author
-
TrevMk2
Topic author
Re: MK2 sill repair
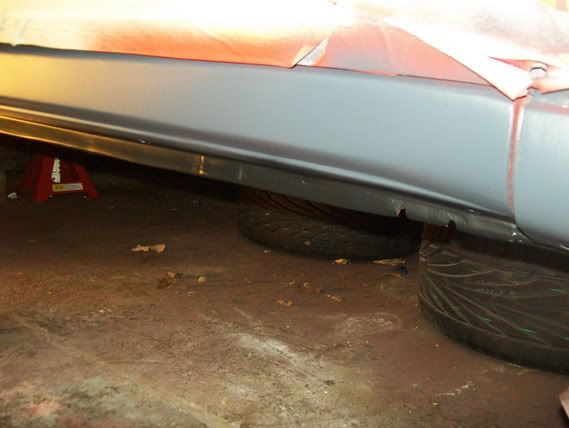
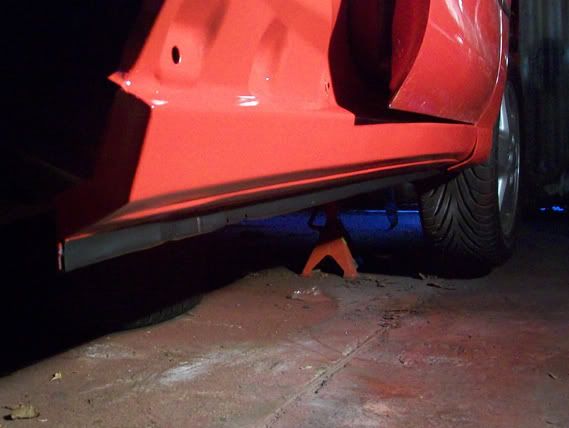
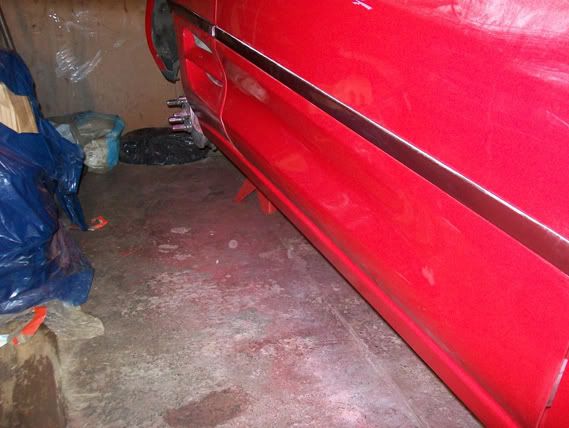
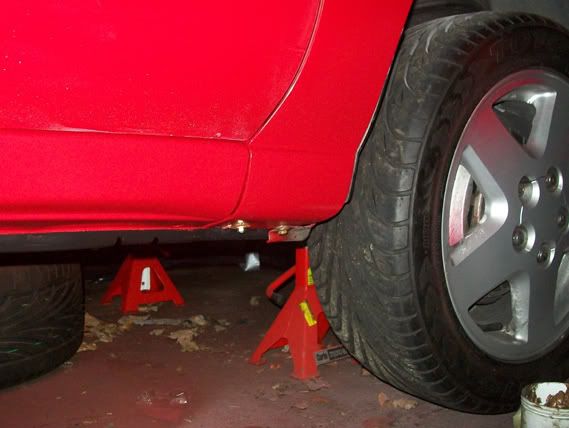
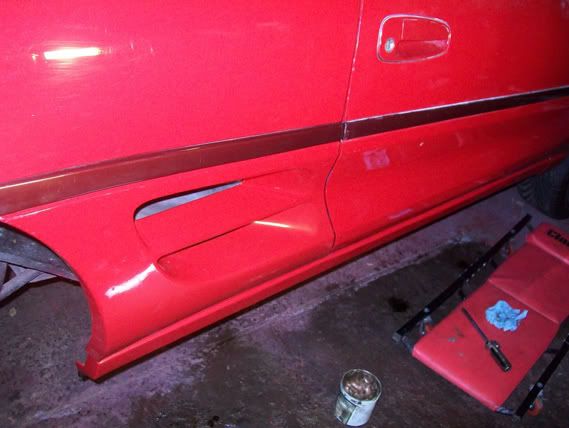
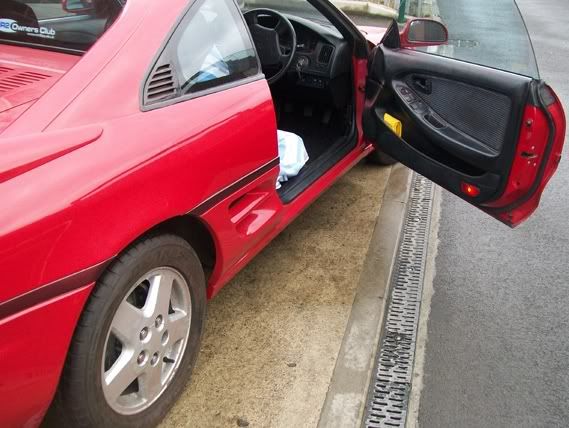
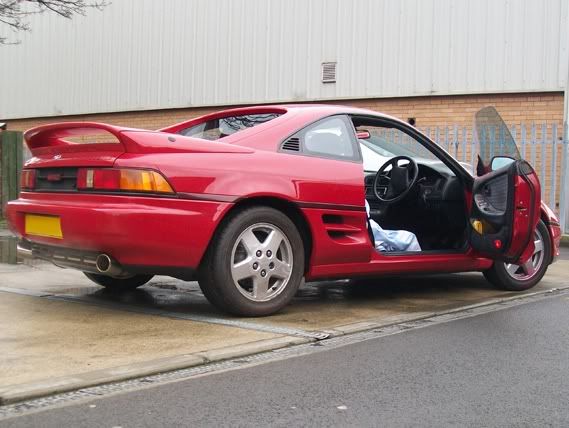
Took her out of the garage to turn around to start on the other side today, here's a couple of pic's from the side.

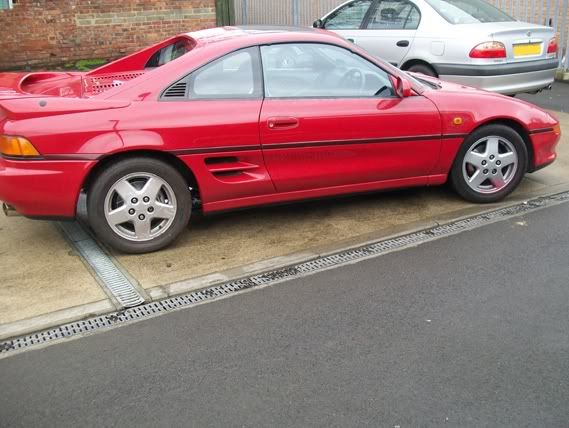
She needs a good clean, but I'll sort that out when the other sides done.
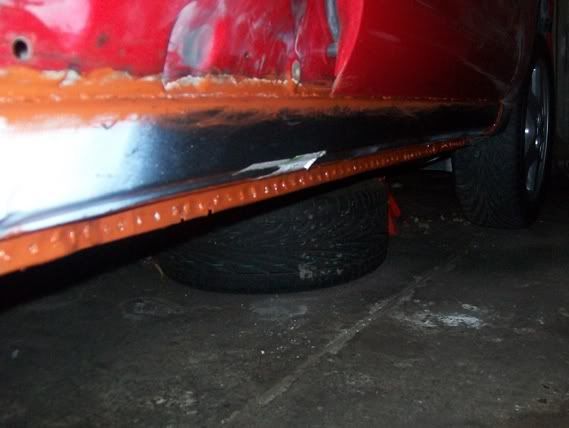
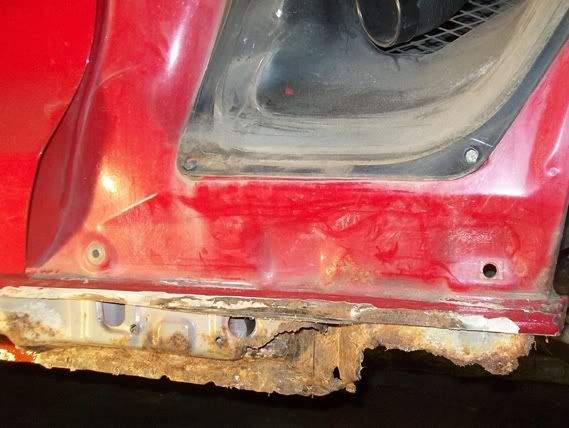
Okay, I don't want to bore you with the other side repair but I thought you might like to see these pic's, again I'm please I've taken the full length out!
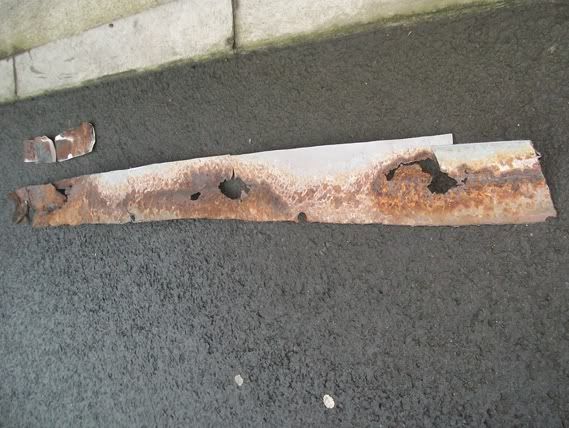
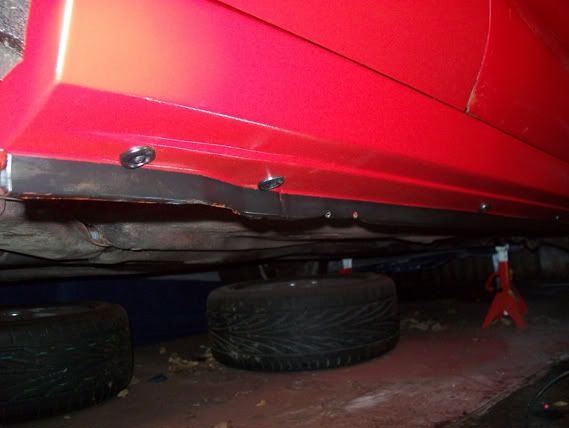
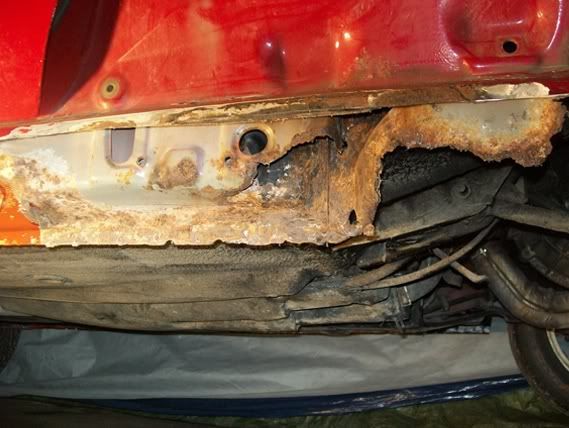
The rear of the sill has been sculptured by a master crafty person! It must have taken ages to create, this was over a badly patched panel at the rear.

And this is what was under it.

She needs a good clean, but I'll sort that out when the other sides done.
Okay, I don't want to bore you with the other side repair but I thought you might like to see these pic's, again I'm please I've taken the full length out!
The rear of the sill has been sculptured by a master crafty person! It must have taken ages to create, this was over a badly patched panel at the rear.
And this is what was under it.
-
BrianDeacon
Topic author
Re: MK2 sill repair
Really nice job Trev. You set the standard with the Astra sill as it looks very good. Brian